m (→Mechanics) |
m (→Distribution of Crew Types: updating link) |
||
| (6 intermediate revisions by 3 users not shown) | |||
| Line 23: | Line 23: | ||
== Mechanics == |
== Mechanics == |
||
[[Image:hiring_mechanic.png|thumbnail|right|400px|Hiring a Mechanic in the Tavern.]] |
[[Image:hiring_mechanic.png|thumbnail|right|400px|Hiring a Mechanic in the Tavern.]] |
||
| − | Mechanics help your plane's |
+ | Mechanics help your plane's [[Condition]] from dropping too quickly, and keep it together during combat. Mechanics can also help scavenge for gun mods after combat. The maximum number of effective mechanics you can have is 2. Mechanics level up with combat and flight points. |
<br clear="all" /> |
<br clear="all" /> |
||
| Line 36: | Line 36: | ||
! Influence and Gold <br> added at Full Morale |
! Influence and Gold <br> added at Full Morale |
||
| 2% || 4%|| 6% || 8% || 10% || 12% || 14% || 16% || 18% || 20% |
| 2% || 4%|| 6% || 8% || 10% || 12% || 14% || 16% || 18% || 20% |
||
| − | | |
+ | |}<br clear="all" /> |
== Navigators == |
== Navigators == |
||
[[Image:hiring_navigator.png|thumbnail|right|400px|Hiring a Navigator in the Tavern.]] |
[[Image:hiring_navigator.png|thumbnail|right|400px|Hiring a Navigator in the Tavern.]] |
||
| − | Navigators can plot courses that either keep you out of trouble or throw you headfirst into it. While their risky/safe flights may initially take longer than a regular flight, they'll get faster as they level up. The maximum number of effective navigators you can have is 1. Navigators level up with flight points.<br> |
+ | Navigators can plot courses that either keep you out of trouble or throw you headfirst into it. While their risky/safe flights may initially take longer than a regular flight, they'll get faster as they level up. The maximum number of effective navigators you can have is 1. Navigators level up with flight points.<br> <br clear="all" /> |
| − | They can also increase encounter rates on hunts.{{verify}} <br clear="all" /> |
||
{| border="1" cellpadding="5" cellspacing="0" style="float:none; width: 500px; font-size: 90%; text-align: center; background:#f5f5f5;" |
{| border="1" cellpadding="5" cellspacing="0" style="float:none; width: 500px; font-size: 90%; text-align: center; background:#f5f5f5;" |
||
| Line 92: | Line 91: | ||
== Distribution of Crew Types == |
== Distribution of Crew Types == |
||
| − | <p>The chance of finding each crew type varies depending on the skyland |
+ | <p>The chance of finding each crew type varies depending on the skyland, with capitals tending to be the most specialized. [[Arcadia]] averages 1.2 Diplomats per visit, [[Eltsina (skyland)|Eltsina]] 1.4 Traders per visit, [[Fuseli (skyland)|Fuseli]] 1.1 Mechanics per visit, [[Islo (skyland)|Islo]] 0.95 Navigators per visit, and [[Lhasa]] 0.88 Diplomats per visit.</p> |
| + | |||
| + | <p>Mechanics can be most frequently found on [[Fuseli (skyland)|Fuseli]], [[Midgard]], [[Isla di Pisa]], and [[Jordan]]. Traders can be found most frequently on [[Eltsina (skyland)|Eltsina]], [[Luz]], [[Steppe]], and [[Sharif]]. Diplomats can be found most frequently on [[Tinkspoit]], [[Arcadia]], [[Lhasa]], and [[Alpha 13]]. Navigators are especially difficult to find, with 14 skylands having never been seen to offer a Navigator, but they can be found most frequently on [[Islo]], [[Alpha 11]], [[Alpha 10]], and [[Valvia]].</p> |
||
| + | |||
| + | <p>The following chart is an initial look at the prevalence of crew types on various skylands. The percentages are the odds that a particular type of crew will be present upon a single visit. Since up to two crew members are available at each landing, the theoretical maximum value is 200%, while a random distribution would give an average of 50%. The chart also shows the average number of crew members available upon each landing. Skylands with 20 landings' worth data reported are considered to have a "good" amount data, while those with less than 20 observations need "more" in order to be considered well-represented. Please consider aiding this effort by adding to the chart in the [https://docs.google.com/spreadsheet/ccc?key=0ApsOy0I9RTBrdGNQZWJXc3I2clU2YnUxR2p0c1dqN3c#gid=60 2.5 Compendium] whenever you're in the Tavern.</p> |
||
| + | |||
| + | {{brclearall}} |
||
| + | {| border="1" cellpadding="5" cellspacing="0" style="float:none; width: 250px; font-size: 90%; text-align: center; background:#f5f5f5;" |
||
| + | ! Skyland !! Mechanic !! Trader !! Diplomat !! Navigator !! # of Crew !! More data? |
||
| + | |- |
||
| + | ! Aleut |
||
| + | | 48% || 64% || 48% || 25% || 1.84 || Good |
||
| + | |- |
||
| + | ! ALPHA 1 |
||
| + | | 25% || 25% || 25% || 75% || 1.50 || More |
||
| + | |- |
||
| + | ! ALPHA 2 |
||
| + | | 68% || 68% || 27% || 0% || 1.63 || Good |
||
| + | |- |
||
| + | ! ALPHA 3 |
||
| + | | 0% || 50% || 50% || 25% || 1.25 || More |
||
| + | |- |
||
| + | ! ALPHA 4 |
||
| + | | 22% || 44% || 67% || 25% || 1.56 || More |
||
| + | |- |
||
| + | ! ALPHA 5 |
||
| + | | 93% || 33% || 47% || 0% || 1.73 || More |
||
| + | |- |
||
| + | ! ALPHA 6 |
||
| + | | 43% || 71% || 14% || 43% || 1.71 || More |
||
| + | |- |
||
| + | ! ALPHA 7 |
||
| + | | 40% || 20% || 40% || 40% || 1.40 || More |
||
| + | |- |
||
| + | ! ALPHA 8 |
||
| + | | 75% || 25% || 50% || 25% || 1.75 || More |
||
| + | |- |
||
| + | ! ALPHA 9 |
||
| + | | 60% || 100% || 20% || 20% || 2.00 || More |
||
| + | |- |
||
| + | ! ALPHA 10 |
||
| + | | 31% || 23% || 46% || 62% || 1.62 || More |
||
| + | |- |
||
| + | ! ALPHA 11 |
||
| + | | 22% || 33% || 67% || 67% || 1.89 || More |
||
| + | |- |
||
| + | ! ALPHA 12 |
||
| + | | 55% || 36% || 27% || 45% || 1.64 || More |
||
| + | |- |
||
| + | ! ALPHA 13 |
||
| + | | 44% || 25% || 75% || 31% || 1.75 || More |
||
| + | |- |
||
| + | ! ALPHA 14 |
||
| + | | 0% || 33% || 133% || 33% || 2.00 || More |
||
| + | |- |
||
| + | ! ALPHA 15 |
||
| + | | 67% || 33% || 0% || 67% || 1.67 || More |
||
| + | |- |
||
| + | ! ALPHA 16 |
||
| + | | 31% || 38% || 44% || 50% || 1.63 || More |
||
| + | |- |
||
| + | ! ALPHA 17 |
||
| + | | 56% || 72% || 17% || 44% || 1.89 || More |
||
| + | |- |
||
| + | ! Arcadia |
||
| + | | 0% || 0% || 120% || 52% || 1.72 || Good |
||
| + | |- |
||
| + | ! Cidade |
||
| + | | 53% || 21% || 65% || 35% || 1.74 || Good |
||
| + | |- |
||
| + | ! Earthbreach |
||
| + | | 67% || 50% || 17% || 33% || 1.67 || More |
||
| + | |- |
||
| + | ! Echo |
||
| + | | 73% || 36% || 64% || 0% || 1.73 || More |
||
| + | |- |
||
| + | ! Eltsina |
||
| + | | 5% || 143% || 38% || 0% || 1.86 || Good |
||
| + | |- |
||
| + | ! Fuseli |
||
| + | | 114% || 24% || 0% || 33% || 1.71 || Good |
||
| + | |- |
||
| + | ! Getty |
||
| + | | 39% || 36% || 61% || 18% || 1.54 || Good |
||
| + | |- |
||
| + | ! Goldenrod |
||
| + | | 33% || 60% || 40% || 33% || 1.67 || More |
||
| + | |- |
||
| + | ! Gonk |
||
| + | | 53% || 50% || 47% || 25% || 1.75 || Good |
||
| + | |- |
||
| + | ! Grottopolis |
||
| + | | 25% || 25% || 25% || 25% || 1.00 || More |
||
| + | |- |
||
| + | ! Isla di Pisa |
||
| + | | 96% || 70% || 0% || 0% || 1.67 || Good |
||
| + | |- |
||
| + | ! Islo |
||
| + | | 74% || 0% || 11% || 96% || 1.79 || More |
||
| + | |- |
||
| + | ! Jordan |
||
| + | | 94% || 56% || 0% || 0% || 1.50 || More |
||
| + | |- |
||
| + | ! Juliet |
||
| + | | 33% || 0% || 33% || 100% || 1.67 || More |
||
| + | |- |
||
| + | ! Kadath |
||
| + | | 55% || 9% || 73% || 36% || 1.73 || More |
||
| + | |- |
||
| + | ! Leng |
||
| + | | 31% || 26% || 74% || 43% || 1.74 || Good |
||
| + | |- |
||
| + | ! Lhasa |
||
| + | | 41% || 0% || 88% || 35% || 1.65 || More |
||
| + | |- |
||
| + | ! Luz |
||
| + | | 69% || 100% || 0% || 0% || 1.69 || More |
||
| + | |- |
||
| + | ! Midgard |
||
| + | | 111% || 67% || 0% || 0% || 1.78 || More |
||
| + | |- |
||
| + | ! New Hovlund |
||
| + | | 37% || 43% || 62% || 33% || 1.75 || Good |
||
| + | |- |
||
| + | ! Olio |
||
| + | | 80% || 40% || 0% || 0% || 1.20 || More |
||
| + | |- |
||
| + | ! Phillipia |
||
| + | | 43% || 71% || 71% || 0% || 1.86 || More |
||
| + | |- |
||
| + | ! Romeo |
||
| + | | 0% || 200% || 0% || 0% || 2.00 || More |
||
| + | |- |
||
| + | ! Sharif |
||
| + | | 38% || 85% || 23% || 15% || 1.62 || More |
||
| + | |- |
||
| + | ! Shriebeck |
||
| + | | 86% || 64% || 19% || 0% || 1.69 || Good |
||
| + | |- |
||
| + | ! Steppe |
||
| + | | 81% || 94% || 0% || 0% || 1.75 || Good |
||
| + | |- |
||
| + | ! Tehras |
||
| + | | 67% || 100% || 33% || 0% || 2.00 || More |
||
| + | |- |
||
| + | ! Tinkspoit |
||
| + | | 25% || 13% || 1.25% || 31% || 1.94 || More |
||
| + | |- |
||
| + | ! Tortuga |
||
| + | | 67% || 33% || 33% || 67% || 2.00 || More |
||
| + | |- |
||
| + | ! Uurwerk |
||
| + | | 36% || 18% || 45% || 45% || 1.45 || More |
||
| + | |- |
||
| + | ! Valvia |
||
| + | | 25% || 33% || 67% || 58% || 1.83 || More |
||
| + | |- |
||
| + | ! Volstoy |
||
| + | | 50% || 50% || 50% || 50% || 2.00 || More |
||
| + | |}<br clear="all" /> |
||
==Species== |
==Species== |
||
| − | Though the art is unquestionably superb, the species are not always entirely obvious. There are usually two to three color combinations for each of these types; the list below is just a sample of what each species looks like. |
+ | Though the art is unquestionably superb, the species are not always entirely obvious. There are usually two to three color combinations for each of these types; the list below is just a sample of what each species looks like. Also note that possibly personalities are based on crew species, so it may not always be possible to get the exact crew species and personality you want. |
===Cats=== |
===Cats=== |
||
| Line 138: | Line 296: | ||
== References == |
== References == |
||
{{reflist}} |
{{reflist}} |
||
| + | |||
| + | ==External links== |
||
| + | * [http://skyrates.net/crs.php Crewmate Reunion Services] |
||
[[Category:Crew|*]] |
[[Category:Crew|*]] |
||
Latest revision as of 20:26, 3 August 2014

To hire crew, talk with the moose in the Tavern.
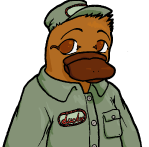
Crew are various NPC's within the game that provide different benefits when you hire them. They can be hired at any skyland's tavern from the moose bartender, and cost 50000Ģ. Different crafts have different crew capacities, and Tier 0 planes cannot carry crew.
Traders[]
Traders help find the best deals. They reduce the buy and sell tax of transactions and can salvage after a combat to increase your bounty (see Combat Levels and Bounty). The maximum number of effective traders you can have is 2. Traders level up with trade points. Traders provide approximately double the discount when Trading paper or steel (these two goods are not covered by a Trading skill on the Skill Tree).[1]
| Trader Level | 1 | 2 | 3 | 4 | 5 | 6 | 7 | 8 | 9 | 10 |
|---|---|---|---|---|---|---|---|---|---|---|
| Tax Reduction at Full Morale for steel & paper goods |
3.2% | 6.4% | 9.6% | 12.4% | 16% | 19.2% | 22.4% | 25.6% | 28.8% | 32% |
| Tax Reduction at Full Morale for all other goods |
1.6% | 3.2% | 4.8% | 6.4% | 8% | 9.6% | 11.2% | 12.8% | 14.4% | 16% |
| Salvage Bonus (Full Morale) |
1.25% | 2.5% | 3.75% | 5% | 6.25% | 7.5% | 8.75% | 10% | 11.25% | 12.5% |
Mechanics[]

Hiring a Mechanic in the Tavern.
Mechanics help your plane's Condition from dropping too quickly, and keep it together during combat. Mechanics can also help scavenge for gun mods after combat. The maximum number of effective mechanics you can have is 2. Mechanics level up with combat and flight points.
Diplomats[]

Hiring a Diplomat in the Tavern.
Diplomats increase the payout of missions, reduce bribe costs, and can negotiate to prevent some cargo loss when raided by pirates. The maximum number of effective diplomats you can have is 2. Diplomats level a small amount with flight, combat, and trade points, and a large amount from reputation points.
| Diplomat Level | 1 | 2 | 3 | 4 | 5 | 6 | 7 | 8 | 9 | 10 |
|---|---|---|---|---|---|---|---|---|---|---|
| Influence and Gold added at Full Morale |
2% | 4% | 6% | 8% | 10% | 12% | 14% | 16% | 18% | 20% |
[]

Hiring a Navigator in the Tavern.
Navigators can plot courses that either keep you out of trouble or throw you headfirst into it. While their risky/safe flights may initially take longer than a regular flight, they'll get faster as they level up. The maximum number of effective navigators you can have is 1. Navigators level up with flight points.
| Navigator Level | 1 | 2 | 3 | 4 | 5 | 6 | 7 | 8 | 9 | 10 |
|---|---|---|---|---|---|---|---|---|---|---|
| "Risky" Flight Time | +5% | +1% | -3% | -10% | -15% | -20% | -25% | -30% | -35% | -40% (Probably) |
| "Safe" Flight Time | +4% | (+-)0% | -4% | -11% | -16% | -21% | -26% | -31% | -36% | -41% (Probably) |
Upkeep, Experience, and Morale[]

A sample "Crew Card".
Crew members will only do their jobs properly if they're kept happy. All crew have an initial salary of 250Ģ per day. Daily wages increase with crew members' skill level (see below). Crew members will not take split bounty/profit payment if they're fully satisfied (aka 'King-Slime Happy'[1] as in the "sample Crew Card" here), but they will always take wage payments (if you have less than 10000Ģ, they'll not accept wage payments; leaving you a small buffer to ensure you don't get into a tight spot[2]).
Typically, as long as they get paid and do not become injured in combat (they heal on their own if so), they'll stay King-Slime Happy and continue to help you. Having a high Leadership skill will help keep crew happy, if they otherwise aren't, even after being paid. Crew Levels are currently "capped" at 10.[3]
| Crew Level | 1 | 2 | 3 | 4 | 5 | 6 | 7 | 8 | 9 | 10 |
|---|---|---|---|---|---|---|---|---|---|---|
| Daily Salary | 250Ģ | 500Ģ | 1000Ģ | 1500Ģ | 2000Ģ | 2500Ģ | 3000Ģ | 3500Ģ | 4000Ģ | 4500Ģ |
| EXP. for Next Level (Trader) | 100 | 300 | 900 | 2500 | 6500 | 20000 | 45000 | 160000 | 400000 | N/A |
| EXP. for Next Level (Navigator) | 100 | 300 | 1000 | 2500 | 5000 | 10000 | 25000 | 50000 | ?????? | N/A |
| EXP. for Next Level (Other) | 150 | 400 | 1000 | 2500 | 6000 | 15000 | 35000 | 80000 | 160000 | N/A |
| XP Rates | XP/CP | XP/FP | XP/TP | XP/5K Inf |
|---|---|---|---|---|
| Diplomat | 1 | 1 | 1 | 6 |
| Mechanic | 5 | 4 | - | - |
| Navigator | - | 9 | - | - |
| Trader | - | - | 9 | - |
Distribution of Crew Types[]
The chance of finding each crew type varies depending on the skyland, with capitals tending to be the most specialized. Arcadia averages 1.2 Diplomats per visit, Eltsina 1.4 Traders per visit, Fuseli 1.1 Mechanics per visit, Islo 0.95 Navigators per visit, and Lhasa 0.88 Diplomats per visit.
Mechanics can be most frequently found on Fuseli, Midgard, Isla di Pisa, and Jordan. Traders can be found most frequently on Eltsina, Luz, Steppe, and Sharif. Diplomats can be found most frequently on Tinkspoit, Arcadia, Lhasa, and Alpha 13. Navigators are especially difficult to find, with 14 skylands having never been seen to offer a Navigator, but they can be found most frequently on Islo, Alpha 11, Alpha 10, and Valvia.
The following chart is an initial look at the prevalence of crew types on various skylands. The percentages are the odds that a particular type of crew will be present upon a single visit. Since up to two crew members are available at each landing, the theoretical maximum value is 200%, while a random distribution would give an average of 50%. The chart also shows the average number of crew members available upon each landing. Skylands with 20 landings' worth data reported are considered to have a "good" amount data, while those with less than 20 observations need "more" in order to be considered well-represented. Please consider aiding this effort by adding to the chart in the 2.5 Compendium whenever you're in the Tavern.
| Skyland | Mechanic | Trader | Diplomat | Navigator | # of Crew | More data? |
|---|---|---|---|---|---|---|
| Aleut | 48% | 64% | 48% | 25% | 1.84 | Good |
| ALPHA 1 | 25% | 25% | 25% | 75% | 1.50 | More |
| ALPHA 2 | 68% | 68% | 27% | 0% | 1.63 | Good |
| ALPHA 3 | 0% | 50% | 50% | 25% | 1.25 | More |
| ALPHA 4 | 22% | 44% | 67% | 25% | 1.56 | More |
| ALPHA 5 | 93% | 33% | 47% | 0% | 1.73 | More |
| ALPHA 6 | 43% | 71% | 14% | 43% | 1.71 | More |
| ALPHA 7 | 40% | 20% | 40% | 40% | 1.40 | More |
| ALPHA 8 | 75% | 25% | 50% | 25% | 1.75 | More |
| ALPHA 9 | 60% | 100% | 20% | 20% | 2.00 | More |
| ALPHA 10 | 31% | 23% | 46% | 62% | 1.62 | More |
| ALPHA 11 | 22% | 33% | 67% | 67% | 1.89 | More |
| ALPHA 12 | 55% | 36% | 27% | 45% | 1.64 | More |
| ALPHA 13 | 44% | 25% | 75% | 31% | 1.75 | More |
| ALPHA 14 | 0% | 33% | 133% | 33% | 2.00 | More |
| ALPHA 15 | 67% | 33% | 0% | 67% | 1.67 | More |
| ALPHA 16 | 31% | 38% | 44% | 50% | 1.63 | More |
| ALPHA 17 | 56% | 72% | 17% | 44% | 1.89 | More |
| Arcadia | 0% | 0% | 120% | 52% | 1.72 | Good |
| Cidade | 53% | 21% | 65% | 35% | 1.74 | Good |
| Earthbreach | 67% | 50% | 17% | 33% | 1.67 | More |
| Echo | 73% | 36% | 64% | 0% | 1.73 | More |
| Eltsina | 5% | 143% | 38% | 0% | 1.86 | Good |
| Fuseli | 114% | 24% | 0% | 33% | 1.71 | Good |
| Getty | 39% | 36% | 61% | 18% | 1.54 | Good |
| Goldenrod | 33% | 60% | 40% | 33% | 1.67 | More |
| Gonk | 53% | 50% | 47% | 25% | 1.75 | Good |
| Grottopolis | 25% | 25% | 25% | 25% | 1.00 | More |
| Isla di Pisa | 96% | 70% | 0% | 0% | 1.67 | Good |
| Islo | 74% | 0% | 11% | 96% | 1.79 | More |
| Jordan | 94% | 56% | 0% | 0% | 1.50 | More |
| Juliet | 33% | 0% | 33% | 100% | 1.67 | More |
| Kadath | 55% | 9% | 73% | 36% | 1.73 | More |
| Leng | 31% | 26% | 74% | 43% | 1.74 | Good |
| Lhasa | 41% | 0% | 88% | 35% | 1.65 | More |
| Luz | 69% | 100% | 0% | 0% | 1.69 | More |
| Midgard | 111% | 67% | 0% | 0% | 1.78 | More |
| New Hovlund | 37% | 43% | 62% | 33% | 1.75 | Good |
| Olio | 80% | 40% | 0% | 0% | 1.20 | More |
| Phillipia | 43% | 71% | 71% | 0% | 1.86 | More |
| Romeo | 0% | 200% | 0% | 0% | 2.00 | More |
| Sharif | 38% | 85% | 23% | 15% | 1.62 | More |
| Shriebeck | 86% | 64% | 19% | 0% | 1.69 | Good |
| Steppe | 81% | 94% | 0% | 0% | 1.75 | Good |
| Tehras | 67% | 100% | 33% | 0% | 2.00 | More |
| Tinkspoit | 25% | 13% | 1.25% | 31% | 1.94 | More |
| Tortuga | 67% | 33% | 33% | 67% | 2.00 | More |
| Uurwerk | 36% | 18% | 45% | 45% | 1.45 | More |
| Valvia | 25% | 33% | 67% | 58% | 1.83 | More |
| Volstoy | 50% | 50% | 50% | 50% | 2.00 | More |
Species[]
Though the art is unquestionably superb, the species are not always entirely obvious. There are usually two to three color combinations for each of these types; the list below is just a sample of what each species looks like. Also note that possibly personalities are based on crew species, so it may not always be possible to get the exact crew species and personality you want.


